Getting Started: Why Replace Your Drive Belt?
Is your Craftsman lawn tractor showing signs of sluggishness? A worn-out drive belt is a common culprit, leading to poor cutting performance and potential engine strain. Fortunately, replacing the belt is a manageable DIY project, saving you the cost and inconvenience of professional repair. This guide provides a step-by-step approach, using clear instructions and diagrams to help you get the job done safely and efficiently. Remember, though, safety is paramount—always prioritize your well-being. For additional Craftsman resources, check out this helpful site: Craftsman resources.
Tools and Materials: Gathering Your Arsenal
Before you begin, gather the necessary tools and materials. Having everything readily available streamlines the process.
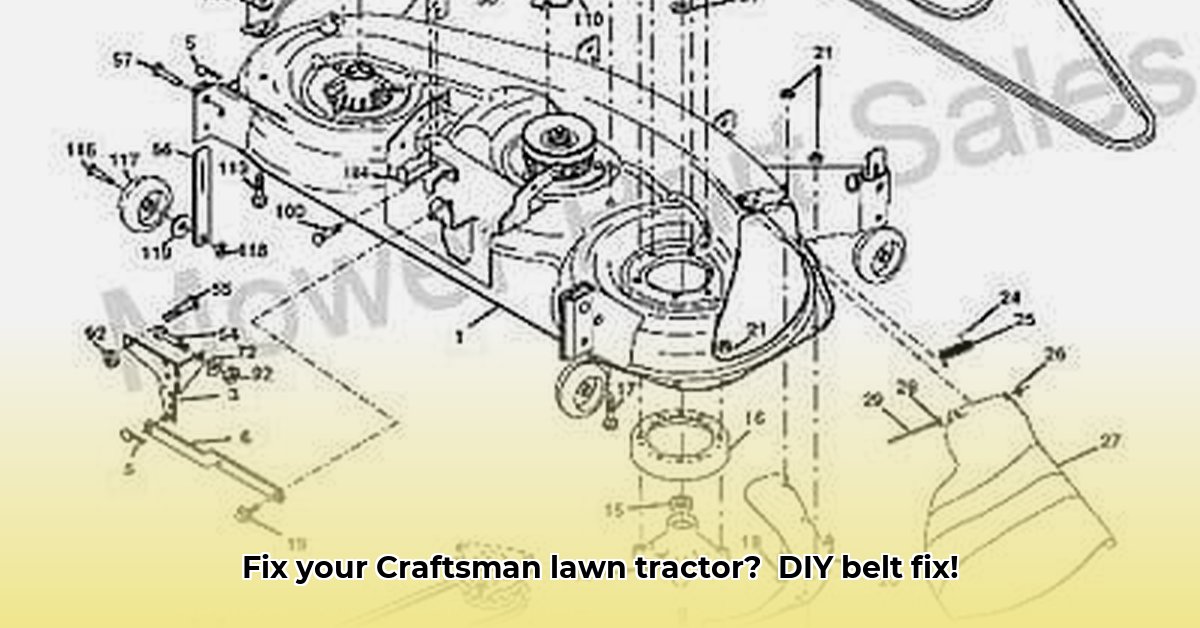
- New Craftsman Drive Belt: This is non-negotiable. Find the exact part number for your model using your owner's manual or the Craftsman website (1). Using an incorrect belt can damage your mower's components.
- Socket Set and Wrenches: A variety of metric and standard sizes might be needed, depending on your tractor model. Consult your owner's manual for the specific sizes required.
- Screwdrivers (Phillips and Flathead): These are essential for removing covers and fasteners.
- Safety Glasses: Protect your eyes from flying debris.
- Work Gloves: Protect your hands from grease and grime.
- Pliers: Useful for adjusting belt tension or removing stubborn fasteners.
- Penetrating Oil (Optional): Useful for freeing up stuck pulleys.
Safety First: Prioritizing Your Well-being
Safety is not optional. Taking these precautions before you begin is critical:
- Disconnect the Spark Plug Wire: This prevents accidental engine starts, a major safety hazard. This simple action eliminates the risk of injury.
- Wear Protective Gear: Always use safety glasses to protect your eyes and work gloves to protect your hands. Closed-toe shoes are also advisable.
Step-by-Step Belt Replacement: A Detailed Guide
Each Craftsman model is unique. Your owner's manual is your definitive guide for precise locations and procedures. These steps are a general guideline; always refer to your model-specific instructions.
Access the Drive Belt: Locate the belt. This usually involves removing the mower deck. Your owner's manual will provide detailed instructions on removing and securing the deck. (This frequently involves removing some bolts.)
Release Belt Tension: Some models feature a tensioner pulley. Loosen it to release tension on the drive belt, making removal easier.
Remove the Old Belt: Carefully remove the old, worn belt. Take a photograph or make detailed notes of the belt's routing, as this will be essential for installing the new one.
Inspect Pulleys: Before installing the new belt, take a moment to inspect the pulleys for any damage. Smooth-running pulleys are important for accurate belt functioning.
Install the New Belt: Carefully route the new belt onto the pulleys, following the path of the old belt (refer to your photo or notes). Ensure the belt is correctly seated on all pulleys.
Reassemble and Test: Reassemble the mower deck and all components, ensuring all fasteners are securely tightened. Reconnect the spark plug wire. Start the engine and check for unusual noises or vibrations. Verify that the blades are turning correctly.
Troubleshooting Common Problems: Addressing Potential Issues
Even with careful attention, complications can arise:
- Belt Slipping: A slipping belt suggests incorrect tension. Refer to your owner's manual for the proper tension specifications. If the belt continues to slip, there may be a more significant problem requiring further investigation.
- Incorrect Belt Routing: Double-check the belt routing against your diagram or notes. Incorrect routing is a common cause of belt slippage.
- Stuck Pulleys: If a pulley is jammed, try applying penetrating oil and gently working it free. Avoid excessive force, which could cause damage.
Preventative Maintenance: Extending the Life of Your Mower
Regular inspection of your drive belt and other components is crucial for preventative maintenance. Cracks, fraying, or other wear signs indicate the need for replacement. This proactive approach helps avoid unexpected breakdowns and extends the life of your Craftsman lawn tractor. A regular inspection (at least once a year, or more frequently if used extensively) is advisable. This simple step can save you time and money in the long run. Remember, a well-maintained lawn tractor provides years of reliable service.